Showing posts with label Gardening. Show all posts

Sunday, May 16, 2010

The Fruits of My Labor

As I write this, there is a video game blaring on my T.V. that my boys and husband have been playing since we got home from church.  They are in the final stages of a game with a determination to beat it today.  My two-year-old has interrupted this very sentence a few times just to come sit on my lap and see what I'm up to.  Just now, my oldest son walked up to me to stare over my shoulder and see what I'm doing on the internet.  The washing machine is on spin cycle while the dryer is in the final stages of drying the last load of towels (for today.)  All this to say, it's a bit loud in here!  I already retreated outside to walk my gardens, but I'm rethinking why I decided to leave the serenity of my plants to come back inside! Oh yeah, it was those darn mosquitoes!


It finally rained this past Friday after a month without a drop.  I came home from work and sat on my back porch listening to the drops tapping on the tin roof.  I could practically hear my plants rejoicing in the rain as they absorbed every drop.  (Okay, so maybe I was the one rejoicing.)  But, I just love how much greener the leaves are after a good rain!  The rain continued into Saturday and now that Sunday is here with lots of sunshine, all the little garden creatures are out and about again...including the mosquitoes!  But sometimes it's worth becoming a meal to go out and enjoy some of the fruits of your labor!

These Black Swallowtail cat's are really enjoying my Dill

A baby cucumber...

...and one ready to eat!

These somehow never make it out of the garden...I eat them right off the vine!

My Basil

The last of the Peaches on my Peach Tree

These plants made my day!  How 'bout yours?

Monday, April 26, 2010

A few moments of joy this weekend!

I should be invoicing, quoting, or drawing right now, but I need to blog or I just might go crazy!  I've already mentioned in my previous post a couple weeks ago that I've been inundated at work, but this weekend I finally got a few moments to hold my camera instead of a pencil.  Don't get me wrong,  I'm still busy.  I just forced myself to go out and actually enjoy the plants around me instead of seeing work that's not done.  It was nice to get back to the joy of my heart.

'Fragrant Cloud' Rose

Canna Lily

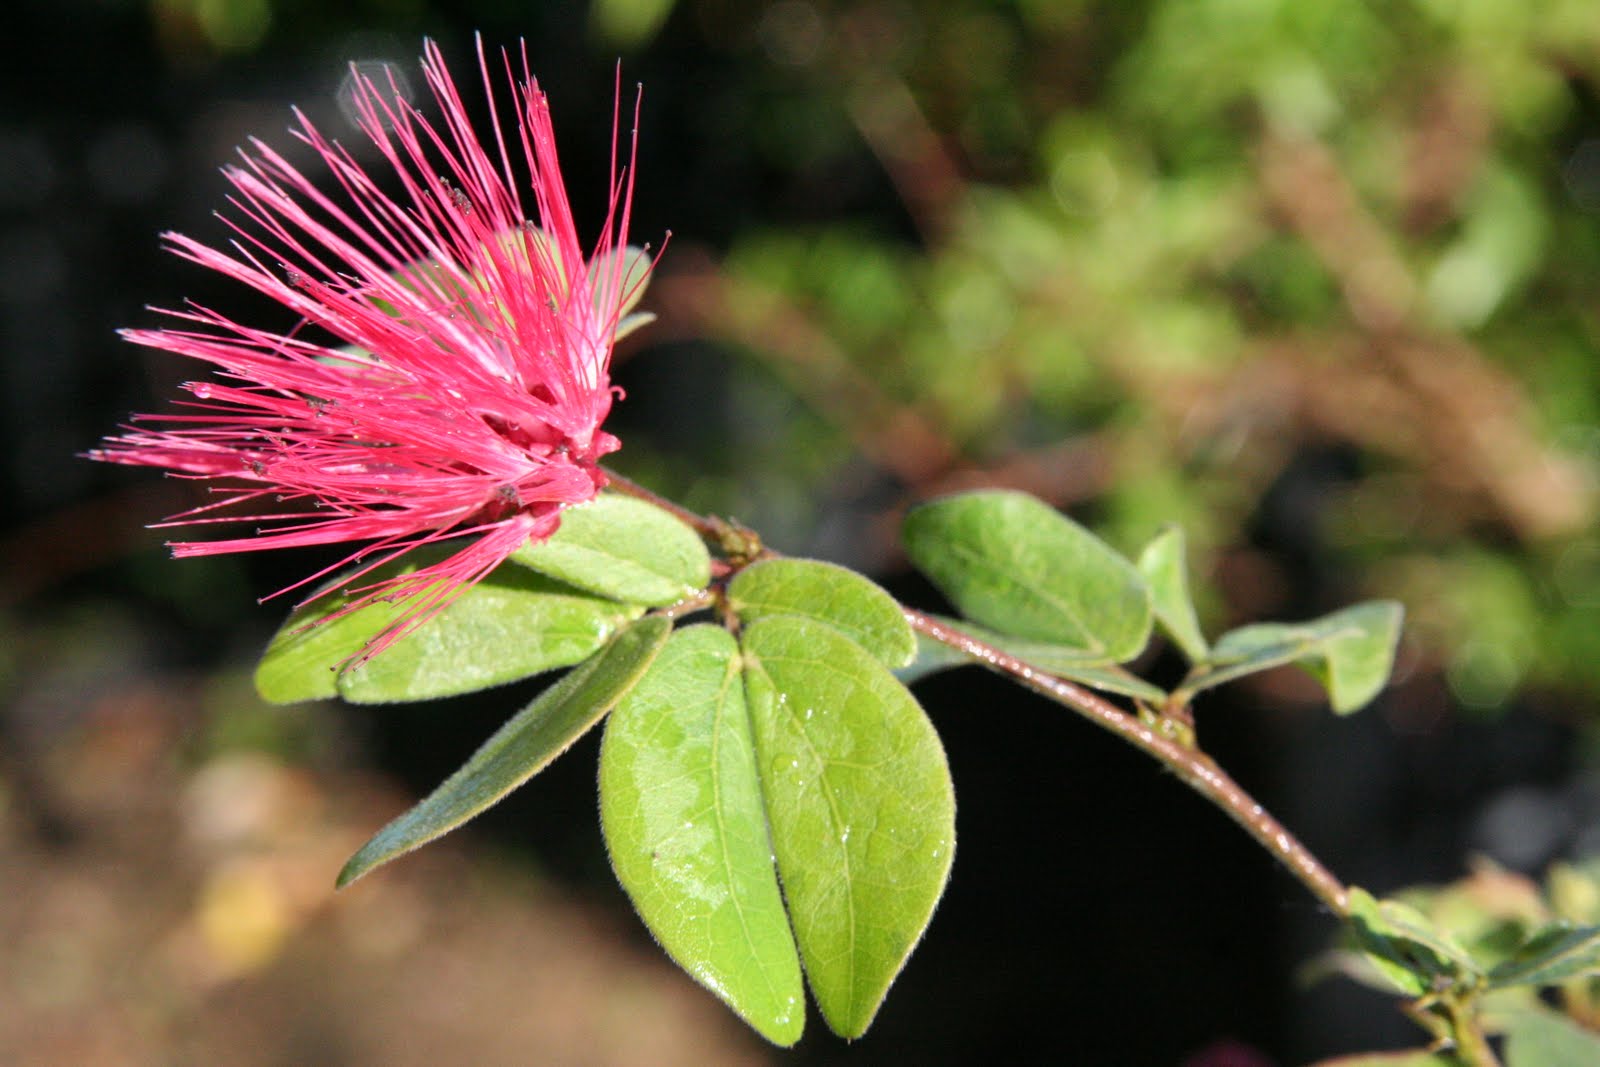
Calliandra 'Dwarf Powder Puff'

Crimson Passion Flower

Double Petunia

Pink Indigo

Itea 'Henry's Garnet'

Crazy Daisy

Society Garlic

I really wish I had the time to write a paragraph or two about each one of these plants for my Plant of the Day section.  ...Maybe later as Spring slows down I'll have a chance to properly add them. (Just take my word for it that they are all fabulous plants and I highly recommend them all!)  

These plants made my day!  How 'bout yours?

Wednesday, March 10, 2010

It's a Plant, Not a Marriage!

I've been asked (what seems like) a hundred times about certain plants here in Houston and if they are going to make it after the big freeze of 2010.  While some people in Houston got lucky and their plants made it through the cold, others were not so lucky.  Ripping out plants that you've had since seedlings or "babies" can be heartbreaking, but I say, "It's a plant, not a marriage!"  Sometimes we just have to start over! While I can't cover every plant I've been asked about, I can cover the biggies: Palms, Hibiscus and Oleander.

Palms
I will be the first to tell you that I am not an expert on palms...at all.  But I have quickly familiarized myself with the most popular ones around town:  Queen Palms, Pygmy Dates, and Sago Palms (which is really a Cycad, but let's not get too technical.) For Palms, the do-or-die moment comes down to the center crown of the plant where new growth shoots out.

Sago Palm center "cone"

 If that center "cone" is mushy, more than likely the palm is a goner.  You can spray that center part with a copper based fungicide to keep any rotten material from infecting live material, but there really is no guarantee that the plant will re-leaf out this Spring.  I DO NOT recommend tearing out any palm until mid April to be sure the new growth isn't going to surprise you later in the season.  These are expensive plants to replace, so wait and be sure before you remove them.

Pygmy Date Palm:  I did not see any sign of green on this palm, but the new growth area was still firm.

If the center "cone" is hard and intact, more than likely the palm will make it.  I've gotten the chance to visit a few of my clients homes that are in North Houston which got much colder than the Cypress area.  Their Queen Palms didn't look happy, but they weren't dead.  There was a little bit of green left on some of the fronds, which is a good sign that they should survive.

A little green left on some of the inner fronds is a good sign!

In either case, DO NOT remove any dead palm leaves until the palm has had a chance to put on a new set of leaves.  The only material that is okay to remove is anything that has already fallen away from the center growth area.

Trim fallen leaves, but leave on any upright growth until new growth appears.

So, if the leaves are still attached and upright, leave them on until you see new growth appear.  Leaving the old fronds on helps distribute the plants energy evenly, which will prevent your new growth from appearing gnarled and twisted when it finally pushes out.  Once the new growth has appeared and grown out a bit, you can then trim away any dead material from the freeze damage.

Hibiscus and Oleander
Unfortunately, I have yet to find a Hibiscus that I believe made it through the freeze.  Every one I've touched and done the scratch test on has been a mushy mess of dead material.  You can do this also, not only with Hibiscus, but with all your plants.  Scratch the stem:  If you find green, you're in business.  If you find brown, dead material, it's a goner.  

A scratch test will tell you if the plant is still alive.
This one is black inside, and the bark easily pulls away.

Every Hibiscus I've scratched has been dead down to the ground.  We may get a surprise later in the Spring with new growth from the roots, but I'm not holding my breath on that one!  Personally, I would rip them out and start over.  I've had so many people say, "But I've had that one for X amount of years." or "But, my "so and so" gave that to me!"  I simply say in return, "It's a plant, not a marriage!"

Oleanders are hit or miss.  Some are still green, but a bit frost damaged.  Others are crispy critters all the way down to the roots.  I've taken the same philosophy on these as I have on the Hibiscus.

Oleander with minor frost damage

Oleander with severe frost damage.

Scratch the stems and if you get green you can wait for them to re-leaf out.  If you get brown, either trim them all the way back and wait for new growth from the roots, or start over with new ones.  Either way, it will take awhile for the Oleanders to bounce back.  They aren't as fast growing as Hibiscus are, so it will probably be a couple of years before they look good again.  Patience is a virtue, my friend!

Microlife and Superthrive
I've mentioned these two products before on several other blog posts, but have to mention them again because I believe in their miracles whole heartedly.  I've had plants that were sticks come back for me with this combination.  Microlife is an organic, slow release fertilizer.  Superthrive is vitamins and hormones that are beneficial to stressed, diseased, or newly transplanted plants.  I recommend fertilizing everything in your yard with Microlife and then go around and water in the Superthrive on top of that.  This combination will help jump-start the life in your soil to get the plants back in shape for spring and summer.  While these two can't bring dead back to life, they can help a really stressed plant recover more quickly.  The quicker a plant recovers this spring, the better it will be able to survive the heat that will be here before we know it.

I hope I answered some of the concerns many Houstonians have had, but if you'd like to leave a comment below, I'd be more than happy to answer any more you might have!

Monday, March 8, 2010

Spring has Sprung!

Pink MegaSplash Geranium

I've been rejoicing in the Spring sunshine we've had in Houston the past week or so.  I've managed to go outside and clean-up most of the mess that winter left.  I've trimmed everything back and fertilized my lawn, pots and bedding plants.  This past Saturday I actually got a little sunburn on my face while working at the nursery.  (I don't think I've ever been so happy about a sunburn in my life!)  I am elated that Spring is here!  This past winter has been one miserable time.  Normally, Houstonians get to garden year round, but the bitter chill kept me inside for three months.  After talking with many homeowners this past weekend, I think the consensus is that Spring is here to stay.  Trees are leafing out, the birds are here, and I even saw a Sulpher butterfly flying around on Saturday!

Shrimp Plant

I'm excited that my hobby and passion in life can get going again.  So many of my favorite things in life happen in my garden.  I love plants, but more importantly, I find that pulling weeds and trimming plants is VERY therapeutic.  My husband would agree that I've been more on edge since I haven't had my favorite way of releasing stress.  I love photographing flowers and butterflies.  I could only take so many pictures of Pansies before I got bored with them, and taking pictures of flowers in our greenhouses at work just isn't the same as taking them in a garden where they are growing in the sunshine.  I've missed blogging about my garden on a somewhat daily basis.  I am very anxious to start posting again, and I already have a few topics that I am gathering pictures for. So, I am thrilled that Spring has finally arrived!

'Ponderosa' Lemon Blossom

My Dad is coming over today or tomorrow to help me till up a vegetable garden in my back yard.  Normally we start one together at our farm, but the winter and early spring have been extremely wet.  We can't get the tractor through our plot without getting stuck.  We've decided to each start a patch at our homes instead.  I'm looking forward to tomatoes right off the vine, squash, okra, and cucumbers!  I have a 101 in 1001 goal to make my own pickles, so I'll also be growing Dill.  I also have plans of extending a flower bed in my front yard.  My husband and I moved in February to a house with lots of trees in the front yard.  This will be the first time I get to garden at my home with a shade and dappled light setting.  I am very excited about that!

Bossiaea heterophylla

So, happy Spring everyone!  I can't wait to hear what everyone else is up to in their gardens as the temps warm up across the country!

Tuesday, February 23, 2010

I've Got Spring Fever

Petrea Vine in Greenhouse

Oh how I long for real Spring to arrive here in Houston!  The weather keeps teasing us with warm sunny days, and yet snow is in the forecast for tonight.  I keep walking the greenhouses here at work, my mind just spinning with combinations I want to plant in my flower beds.  Even though March 1st is considered Houston's average last frost date, I think we'll see colder temps into the middle of March.  I'm finding it hard to follow my own advice, and not mess with anything in the yard until then.  I'm anxious to see what has really survived this  winter, and what has bit the dust forever.  I can't wait to sink my hands into some soil, plant my seedlings I started this January, and await the arrival of the first butterflies dancing in the sunshine.  I officially have Spring fever!


Wednesday, January 20, 2010

Put the Pruners Away!

This is for all my Houston readers who are struggling with plants that froze a couple weeks ago.  I get asked everyday by my clients if it's okay to cut things back yet.  The answer is no.  It is better to leave the frost damaged leaves/ stems on the plant until March 1, which is Houston's average last frost date.  Leaving the dead material on the plant insulates the living part of the plant if we get another freeze.  Also, if the dead parts are trimmed too soon, and we get a spell of warm weather (like we are now) the plants think Spring has arrived and will start putting on new growth.  If we get a late freeze, this new growth will die and set the plant back even further.  So, leave the dead growth on any damaged plants, and don't rip anything out until March/April when you can be sure the plant isn't going to surprise you with new growth from its roots/lower stems.  Not everything is completely gone even though it may look like it now.

My last piece of advice is to give your plants a good dose of Superthrive.  Superthrive is simply vitamins and hormones that help stressed/ diseased/ newly transplanted plants perform their best.  It can be combined with a fertilizer in the Spring to really give your plants the extra ummph to get going again.  I've had plants that were literally sticks come back for me with this stuff, and I am a true believer in its miracles.  Simply mix one capfull to a gallon of water and pour around the base of the plant.


Spring will be here before you know it, and we'll have beautiful gardens to play in again.  In the mean time, start some seeds inside that can be transplanted in March.  It just might satisfy that gardening itch to pick up the clippers and cut everything back.

Wednesday, January 6, 2010

Unusually Cold in Houston

This week has been absolutely crazy at the nursery.  We have almost literally had to move the whole 5 acre nursery inside in prep for the cold temps that start tomorrow.  We haven't seen weather this cold since 1970 (according to weather.com)  Plants that normally don't mind our minimal freezing temps are really not going to be very happy with our weather possibly dipping into the teens tomorrow and Friday.  I must say, I'm over the cold weather.  I've had my fill and want the warm sunshine on my face again.  I'm tired of looking at brown sticks.  I want green leaves, colorful flowers, and butterflies dancing in the sky.  (*stomps foot, *folds arms, *pouts)

***On the other hand, I just found out the nursery is going to be closed tomorrow through Sunday since nobody will be buying any plants.  I think I could get used to 4 day weekends in exchange for the cold! ;o)  Watch out Sookie Stackhouse, here I come to finish your book series!

Tuesday, December 1, 2009

Spring Propagating Has Begun!

Its been a very slow day at the nursery today.  The weather brought a cold front with rain in two nights ago which scared away the landscapers.  I do enjoy days like this every once in awhile though because it gives me a chance to re-group, catch up on paperwork, and since it's nearing the end of the season, look forward to Spring growing.  We've been researching new plants for the Spring season and the propagators in the back have been cutting stock plants all day for our Spring crop.

We've increased inventory items like this awesome Cuphea:


The bees have LOVED this plant all Summer!

And this AWESOME 'Mona Lavender' Plectranthus. We couldn't keep these in stock this season!


Beautiful Neon Purple blooms with purple foliage!

Golden Thryalis is a no-brainer for bright summer color!


LOVE this shrub!

Creeping Jenny is a top seller ground cover for us: Lysimachia aurea


I Love this one in between stepping stones!

This is another great groundcover we'll have in the Spring- Pink Buttons - Polygonum capitatum


The little buttons are too cute!

Euryops is a great showstopper constantly blooming since Spring!


Bush Daisy: Euryops

This one just started blooming a couple weeks ago, and will bloom all winter for us: Panama Rose


The scent at night is heavenly!

Salvia greggii loves our heat in the summer.


This is one of my favorite Salvias

Of course we are propagating many more plants, but these are just a few of my favorites.  I've been flipping through seed catalogs and books looking for more Spring ideas.  I'm focusing on warmer days ahead since our first freeze is coming this Friday night.  Have I mentioned I hate cold weather? Because I really do!


Sunday, November 15, 2009

What's In a Name?

When I was in High School, I took Latin as my foreign language.  I opted out of the more popular Spanish here in Texas because I couldn't roll my R's, which always made me feel stupid when trying to speak in front of the class.  I promptly chose Latin because it's a dead language, which meant no speaking in front of the class!  (I know, I know.  Lame excuse for taking a foreign language.)  My other reason for taking the class was I knew I wanted to go into the horticulture industry, which meant I would need some Latin for botanical nomenclature.  Out of all the classes I took in High School, Latin has turned out to be the most beneficial later in life. Not only did I learn words for plant names, I also learned many other derivatives that have helped me with the English language too.

I say all of that so I could go into why I wanted to write this post.  On a daily basis, I look at plant names and can usually break them down with the little bits of Latin I remember or have picked up.  I've found it useful if I have never heard of a certain plant.  Sometimes the name will tell you what color the flower is, the kind of foliage it has, or even let you know where the plant came from.  Latin can indeed be very useful to someone who works in the industry, but to a homeowner or the casual gardener, Latin can be very helpful when buying plants at the local nursery.

Looking for a white flowered plant?  A name with 'Alba' in it somewhere will probably give you what you want.  Want a plant that creeps along the ground?  A name with 'Reptans' will work.  Want to know if a plant is native to your area? If you're in Texas, look for names like 'texensis' in it.  Here are a few other beneficial words that have helped me along the way.

Colors:
  • Red - rubens
  • Orange - aurorius
  • Yellow - luteus or aureus
  • Green - virens
  • Blue - coeruleus
  • Purple - purpureus
  • Brown - fuscus
  • Gray - ravus
  • Black - niger
  • White - alba
Notable Features:
  • Variegated - variegatus
  • Edged - marginata
  • Netted/ Veined - reticulatus
  • Clustered Together - aggregatus
  • Double Flowers - pleniflorous
  • Fingered - digitalis
  • Round - globosus
  • Palmate - palmatus
  • Pointed - pungens
  • Upright - erectus
  • Tall - elatus
  • Short - minor
  • Edible - edulis
  • Fragrant - fragrans
By no means is this list complete, and many of the words have other Latin words that can go with the ones I have listed here.  A person could spend years studying Latin to understand the botanical nomenclature system, but my list helps one to understand that the plant names can be broken down to help identify parts of the plant itself.  They really aren't some made up mumbo-jumbo that some random scientist decided to name the plant upon its discovery!

I came across a book,  Gardener's Latin by Richard Bird, that I use from time to time as a reference for my gardening Latin.  I recommend anyone who is remotely interested in plants to buy the book for a plant name reference.  Since most gardening books are indexed by the botanical name of the plant instead of the common name, I've found it helpful to at least know the Latin names of the plants I have in my gardens.  If the names are too long or complicated to remember, write them down in a journal for reference later.  If you ever have a problem with that plant, you'll easily be able to look it up in a book by its true name.

I'll wrap this post up with a bit of fun.  I know more than a few people in the industry that pride themselves on playing the 'name game' with Latin botanical names of plants.  Walk through a garden with a friend, and whoever knows the most names wins (what they win, I'm not quite sure.)  It's a fun game none the less!  How many botanical names do you know?  I bet a little friendly competition will help you learn more!  You'll feel clever after winning a few rounds...which reminds me of a quote my High School Latin teacher had posted in her classroom.

I would make them all learn English: 
and then I would let the clever ones 
learn Latin as an honor. 


Sir Winston Churchill

This is why I love my job! (Part 2)

After my crew finished the first install, we headed over to my next job of the week.  The house is newly built in an older subdivision and is absolutely gorgeous.  The house is a French Acadiana style with old architecture brought in and restored throughout the house.  It's a beautifully executed house that the homeowners contracted themselves.  I actually already wrote a blog about this homeowners property earlier this summer on Pine Bark Beetles.  She had to cut down nearly 50 pine trees due to the little pests devastation on her 5 acre property.  My heart went out to them as they shelled out thousands of dollars to have the trees removed from their property.  A few months later, the house is ready to move into and we started our landscape install.

These are some before photos:


This is side bed along the driveway.


This is looking across the spa towards the back of the house.


The back of the house.


This is a round bed behind her pool.

Okay, on to the good stuff


I need to go back and get a better angle of this bed...


There are three Podocarpus in front of each column.  I put Frostproof Gardenia's in an "S" shape through the bed, then put Agapanthus, Butterfly Iris, 'Mona Lavender' Plectranthus, Foxtail Fern, Monkey grass, and 'Chocolate Chip' Ajuga throughout the rest of the bed in groups.


The back bed got a Savannah Holly on the very end which will get a bit more sun than the rest of the bed.  That is followed by 'Yuletide" Camellia, Butterfly Iris, Agapanthus, Giant Alocasia, Louisiana Iris, Variegated Dianella, Dwarf Bird of Paradise, and Monkey Grass.  This bed is actually not completely done.  There is going to be a fountain installed on Monday where the white pipe is sticking above the ground behind the spa.  (I'll post finished product then.)


This is the round pool bed which we planted 43 flats of Dwarf Mondo Grass in.  I can't wait for it all to fill in! It's going to be awesome!  The four planters around the pool each got one Foxtail fern, two 'Purple Lady' Iresine, some Colassus yellow Pansies and Sweet Alyssum.

That is all we did for now, but I'm sure you can tell there are many more beds around the house to begin.  The homeowners are having more walls built for the beds to be planted and also installing some walkways leading out to a pond in the back.  I think the timeline for the next phase is to start in February/ March of 2010.  On top of the rest of the backyard, we have a whole front yard to do too.  I can't wait to begin!  The homeowners are a pure joy to work with, and as you can see the planting canvas is a nice one!

This is why I love my job! (Part 1)

I fell off the blogosphere this week from utter exhaustion.  I spent the entire week installing two landscapes that I have been preparing for about a month.  Monday and Tuesday were dedicated to finding two fountains for my clients.  I found the cutest little nursery in the Heights of Houston.  They specialize in fountains and I'm going to post some awesome photos I took there in my next post.  Wednesday I started the first install which was a blank slate backyard except for one small bed the homeowner had just put in.  This was a fun install because the homeowner wanted a butterfly sanctuary.  (If you know me even a little, I'm slightly in love with butterflies, so this was right up my ally!)  We installed a small fountain off their patio, and installed three beds along the fence line.  I can't wait to go back and take pictures six months from now when everything has filled in.


This is looking across her yard with the house directly to my left.


The sun glared this photo, but this is the pottery fountain we installed.  I planted Dwarf Mondo grass around the base.


This is the electrical box we covered.  There is a Confederate Rose in the very back that will grow above the fence and flower beautifully next Fall.  Other plants in this bed: Plumbago, Knockout Rose, Butterfly Iris, Foxtail Fern, and 'Purple Lady' Iresine.


This is the middle bed.  I put Mexican Flame Vine on the arbor with a Savannah Holly next to that for balance.  Other plants are: Milkweed, Euryops, Dwarf Bottlebrush, Candy Corn Cuphea, and Porterweed.  The homeowner is going to put a small bench or birdbath under the arbor.


This is the third bed which has a Bottlebrush tree in the center, along with a Sweet Almond Verbena for scent.  I repeated some of the plants from the other beds in this bed for balance and color.

We wanted to cover her fence line, so we planted Confederate Jasmine between the three beds.  This will give her green space without the beds to weed and mulch.  Like I said, I can't wait to go back in six months and take pictures again after everything has filled in and grown up.  Also, I really want the owners to put a rock border along the bed lines.  I think they will after they put in the rock border in their front yard.  For now though, this job is done!  I'm very pleased with the results.

The second Job I installed will be posted in Part 2, so keep reading...

Thursday, October 15, 2009

Thrillers, Fillers, and Spillers


I've had several questions about container gardening this week, so I thought it might be a good blog topic.  Container gardening can be very fun and rewarding if done right.  The most common question I get asked is, "What plants go together?"  To answer this, I say a pot needs a "Thriller, Filler, and Spiller" to fill out nicely.  I usually get a few laughs or puzzled looks, but I promise this is a recipe for success with containers!

Thrillers


A thriller is usually a taller plant that is the focal point of the pot.  They are the boldest and most exciting part of the group.  Interesting flowers and/or colorful foliage are a couple of things to look for in a thriller.  It is essentially the backbone of the pot, so pick something that has strong visual impact.  The thriller should go in the center of the pot when viewed from all angles, or in the back of the pot when viewed in a corner.  I pick my thriller first, and then co-ordinate my filler and spiller around it.  A few examples for container thrillers are:

For smaller pots:
  • Rudbeckia
  • Amazon Neon Duo Dianthus
  • Coleus (until frost)
  • Cat Whiskers
  • Foxtail Fern
For Larger pots:
  • Purple Fountain grass
  • Aspidistra
  • Cannas
  • Giant Katie Ruellia
  • Variegated Ginger
(Of course these are only a few examples, and many more can be found at local nurseries.)

Fillers


Fillers are used for volume to fill out the container.  They should have complimentary flowers to your thriller.  You can even experiment with contrasting color foliage from your thriller.  Texture of foliage even comes into play with fillers.  A spiky leaf thriller goes nicely with a rounded leaf filler and vice versa.  Either way, this should fill out the pot and not grow taller than your thriller. Don't be afraid to use annuals for your fillers since the blooms sometimes last longer than some perennials, giving the container a bigger visual impact.  This selection should be planted around your thriller so it will fill up the base of the pot.  Some good examples are:
  • Lantana
  • Begonias
  • Petunias
  • Dianthus
  • Ornamental Cabbage or Kale
  • Plectranthus 'Mona Lavender'
  • Dusty Miller
  • Cupheas
  • 'Diamond Frost' Euphorbia
Spillers


Spillers are the anchor to your pot.  They spill over the pot giving the container a look of life and abundance.  The main point of the spiller is to soften the edges of the pot as it spills over the edge and trails the ground.  Again, a spiller should compliment the thriller and filler in color, but can contrast with foliage textures as well.  These should be planted on the edge of the pot to allow them to spill over.  Some good spillers are:
  • Sweet Potato Vine
  • Creeping Jenny
  • Chenille Plant
  • Nasturtiums
  • Alternanthera
  • Lysimachia
  • Pink Buttons
  • Australian Violet
I've given you many examples of each component to a great container garden, but I should also stress that the placement of the pot matters on which plants can go together.  Sun requirements and water requirements need to all match for each plant.  If they don't match, you'll have a lopsided pot when one plant thrives and another dies.  I also want to mention soil as well.  I use a mix of potting soil and rose soil in my containers. The potting soil is light and airy which is needed in pots since the roots are in a confined space and need aeration.  I like rose soil for its composition, and I use it in my flower beds as well.  I combine the two together with a few handfuls of MicroLife fertilizer before I plant my plants.  If the drainage hole at the bottom of your pot is large, a rock can be placed over it to prevent soil from running out of the bottom and provide drainage for water.  Drainage is essential to successful container gardening.  Standing water in saucers is a sure fire way to get root rot and other water born fungal diseases.  The roots need aeration to thrive and be healthy.  Using this soil and drainage technique will give you success!

With the Thriller, Filler and Spiller method, you'll be a container gardening pro in no time!  Have fun pairing things up with one another.  If you find something doesn't work in one pot, put it in another.  Play around with color combinations, foliage, and textures.  Don't let flowers stop you either:  Herbs make great container plants and even have thrillers, fillers, and spillers that make great combinations together.  The sky is the limit!

Good Luck and Happy Planting!
Related Posts with Thumbnails